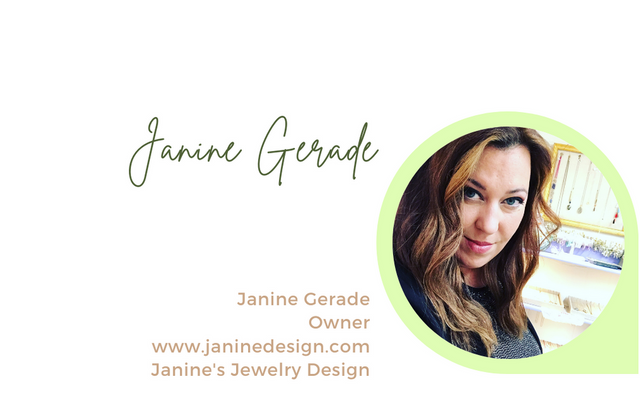
website

MBH TV SHOW/ DIY Show/ Jewelry How-To/ DIY Crafts/ Beading Show

Local Holliston HCAT Channel Show

Join me while I make fun projects on TV.

Below are the supply list and show notes for each show

My Beading Heart Show Premier

​​

Memory Wire Bracelets

These bracelets snap back to shape much like a slinky.


What you will need is:

  • Goggles

  • Memory Wire-  like the Beadalon brand. You can get round but I prefer oval with a larger wrist in silver plated steel.

  • Memory Wire cutters

  • Round Nose pliers

  • Beads that fit nicely over hole of wire and are between 3-14 mm large

  • Charms are optional

I used 6 & 8mm Assorted Glass beads

Hand carved semi precious stones and some pearls won’t fit.


Cut 4-5 loops of wire with the special cutters-use goggles. The steel wire will ruin cutters for other metals making dents in them. You have to get the specific wire cutters only for memory wire only.


String beads and charms (the fun part)


Don’t be afraid to mix it up! Asymmetrical or patterns are fun


Choose colors with the person you are making it for.


Loop and trim ends using goggles again!

Easy Earrings “ My Beading Heart” Show 2

Welcome to My beading Heart! DIY Jewelry Making show.


 I am with my friend Erica Leigh we’re making easy earrings that go with everything.


Make a pair of earrings to match any of your outfits.

You will need:


  • French ear wires in Silver, Brass, Surgical Steel or Gold Filled. Explain Allergies  non-pierced options

  • Round Nosed Pliers

  • Flat Nosed Pliers

  • Cutters

  • Head pins in matching  color metal. Does Not have to be pure silver or gold

  • Matching sets of beads Spacer beads or bead caps

  • Spacer beads or bead caps


Design beads on headpin first. Usually arranged large to small on top but use what looks good to you.


Flatten wire 90 degrees at top of last bead.


Loop with round pliers going up and over


Trim where end of loop meets or wrap around (*explain wrap)


Tuck end in

Open earring loop at bottom outwards and add headpin with beads

Delicate Beaded Necklace using Crimp Beads

“ My Beading Heart” Show #3


Welcome to My beading Heart DIY Jewelry Making show.


I am Janine Gerade and today I am with my friend Nicole.


We are making modern beaded necklaces.


Using tiny seed beads and special focal beads for the front of the necklace makes this design a little more modern.


Tiny seed beads are relatively inexpensive so I purchase more expensive beads for the front and center of the necklace. I am using a shape called rondelle, it's like a squashed ball.


What you will need is:

  • 19 strand Beadolon wire .018 in/ 0.46mm

  • Lobster clasp 10 mm gold or silver plated

  • 1.5 or 2 mm crimp beads in gold or silver plated

  • 3 or 4 mm crimp cover gold or silver plated

  • cutters

  • Flat Nose pliers

  • Focal beads- an odd number (3-9) of beads ranging from 4mm-10mm rondelle or rough cut shape- all the same color. Here’s a link to one example:

https://www.firemountaingems.com/itemdetails/h206531gs

  • 11/0 size seed beads. I like Toho beads, but you can use any. If you want a smaller look you can also use 15/0 seed beads, but you have to check they will go through your wire. Here’s a link to the beads:

https://www.firemountaingems.com/search/?keywords=11/0+seed+beads+toho


To begin:

  1. String on a crimp bead.


  1. Add the loop end of the clasp down about 1”.


  1. Fold over the wire and string back through the crimp bead and hold it.

Make sure the wire isn’t too far down from the clasp-about 1/16” but enough that the clasp can move a little.


  4. Take a flat nose plier and squish the crimp bead. Trim end as close to crimp bead as possible.

If you use a crimping tool, squish with the chamber on the inside first, then use the chamber towards the outside for a folded finish.


   5. Take a crimp cover and snap the crimp inside. Carefully push the two ends of the cover together with pliers or the outer chamber of the crimping tool. Be careful not to mark it too much.


 6. Add seed beads. You can use all one color, mixed colors or a pattern. I added a few accent beads for a little detail but kept it mostly the same color. I didn't want attention too much on this part. I added seed beads to about 8” down. Then I added 2” of rondelle focal beads, then finished up with another 8” of seed beads for an 18” necklace.


 7. Add a crimp bead. Add the other part of the clasp and back through the crimp bead. Repeat Steps 3-5.


8. Try it on!


Modern Bar stretch Bracelet

“My Beading Heart” Show #4


Welcome to My beading Heart! DIY Jewelry Making show.


I am Janine Gerade and today I am with my friend Nicole and

We’re making seed bead stretch bracelets with a fun flair.


You will need:


To Begin:

  1. Cut about 8” of cord. Stretch the cord several times including the ends. This is very important to make the bracelet stronger.

  2. Add a piece of tape about 1-2” from the end to keep beads on. Add the tube bead. String beads on in any pattern you would like. I use solid colors because I am going for a stacking look but there are so many possibilities!.

  3. Measure to your wrist or use a ruler. The average small adult wrist size is 7” and stretches to about 8. I would aim to make it 7.5” including the tube bead if you're making it for someone else or just want to start with a medium size.

  4. Tie a surgeon’s knot. Give a gentle tug to make sure knot isn't sliding.

  5. Trim close to knot and glue.

  6. Tuck knot into tube

  7. Lay to dry several hours.

https://www.youtube.com/watch?v=DGvbUMcK_RI